How to create electric bolts in Adobe Illustrator
Create a vector electric bolt in Adobe Illustrator using these simple steps. It’s shockingly easy (sorry).

If you’re a beginner, you’ll learn how to use some handy in-built Illustrator tools. There’s no need to download premade vectors or to go loose with the Pen Tool when you can create your own lightning bolt in a flash.
Other names for this shape include zap, electric shock, lightning strike and jolt.
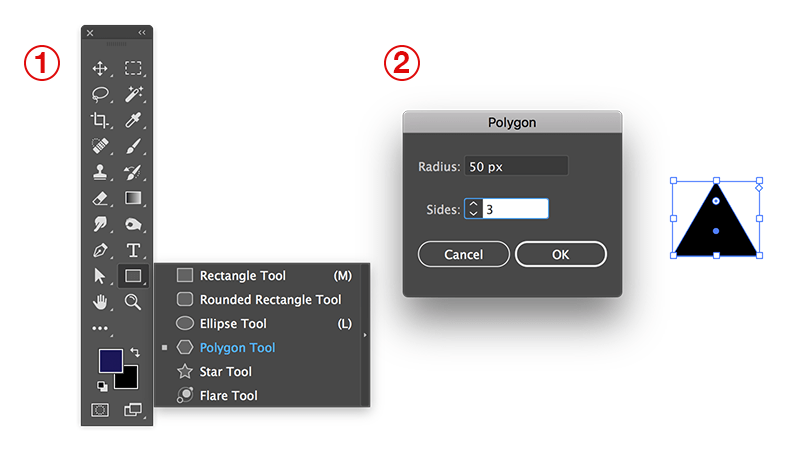
- Use the polygon tool to create a triangle.
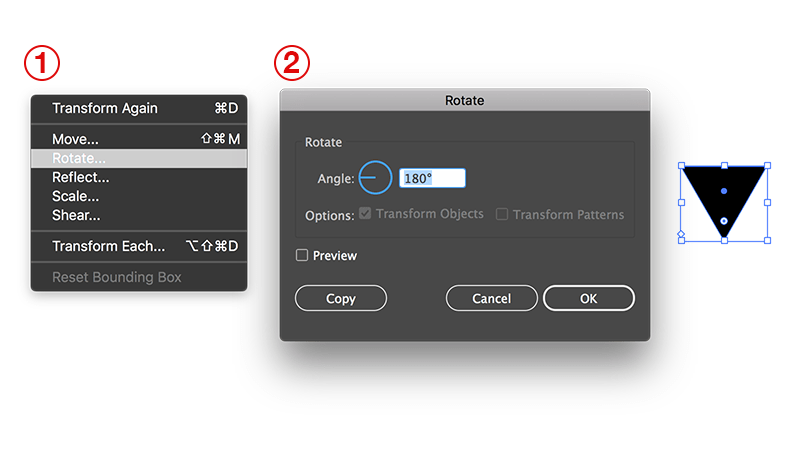
- Flip the triangle vertically or rotate 180 degrees using Object > Transform > Rotate.
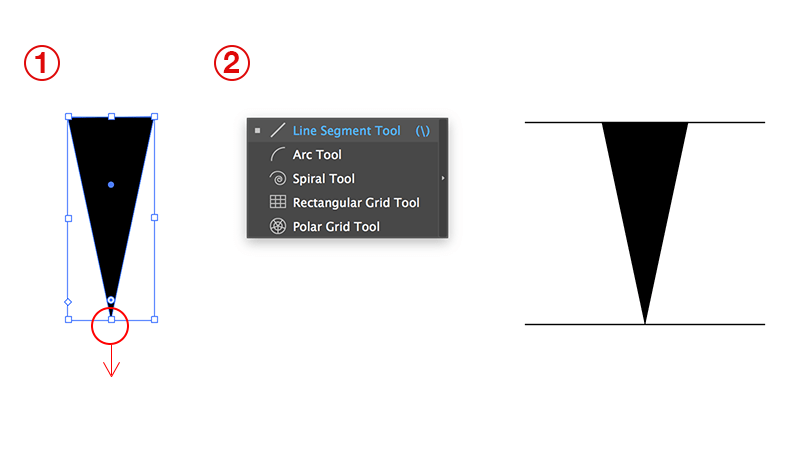
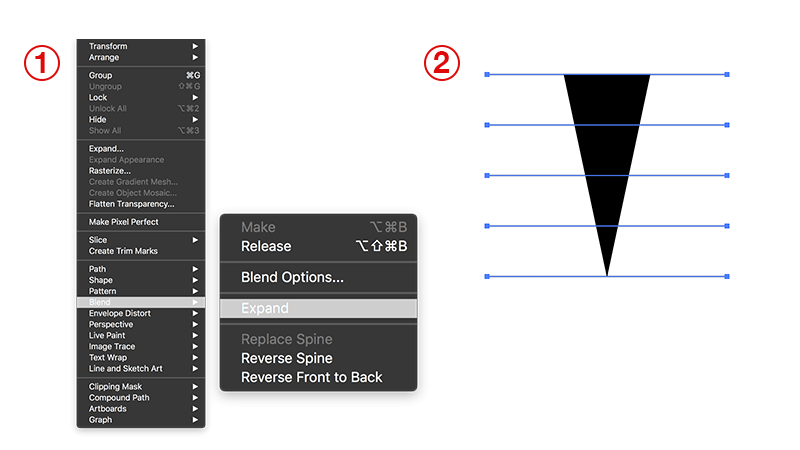
- Elongate the triangle by dragging the bottom middle angle downwards. Use the Line Segment tool to create two lines. Use the Shift key and drag across to create a perfectly horizontal line. Drag to centre-align one of the lines to the top of the triangle and the other to the bottom of the triangle. They should snap into place.
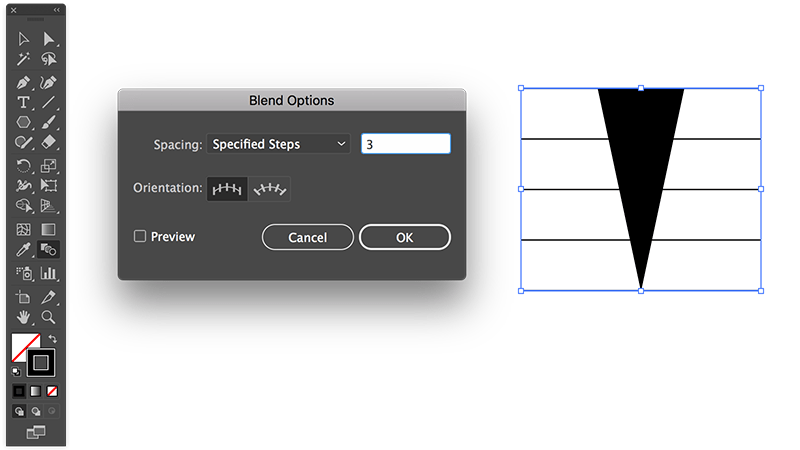
- Double click the Blend Tool icon on the sidebar. Set the spacing to “Specified Steps” and set its value to 3. Click OK. With the blend tool active, click the line at the top of the triangle and then click the line at the bottom of the triangle. Additional lines should appear.
- From the top menu, choose Object > Blend > Expand. This will convert the blend lines into shapes.
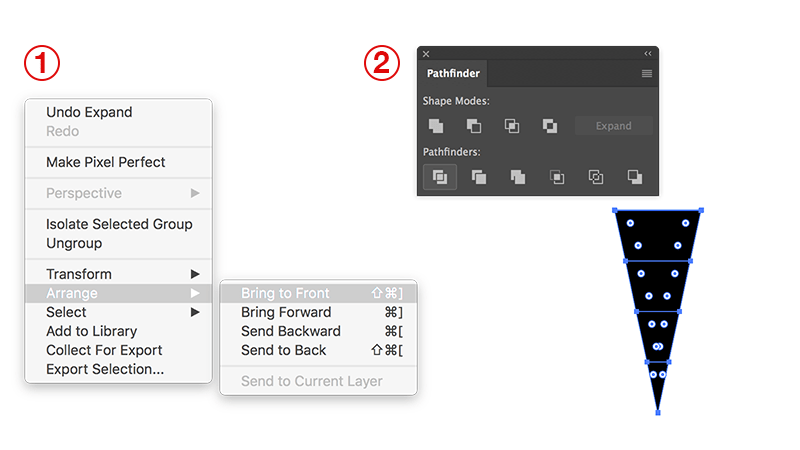
- With the group of lines selected, right click on the group of lines and choose Arrange > Bring to front. Reveal the Pathfinder window if it isn’t visible by selecting Window > Pathfinder from the top menu. Select the triangle and both the lines. Click the Divide button from the Pathfinder window. This will use the lines on the top of the triangle to slice the triangle into pieces.
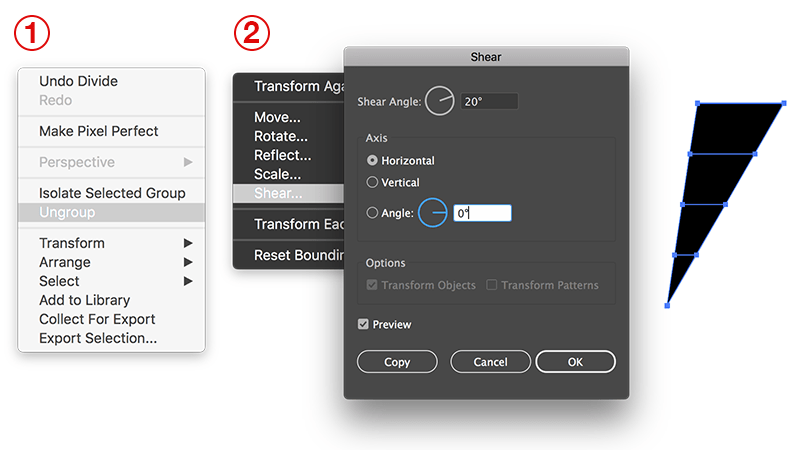
- Right click the group of triangle pieces and select Ungroup from the context menu. From the Top Bar, select Object > Transform > Shear. Set the Shear Angle to 20 degrees and click OK.
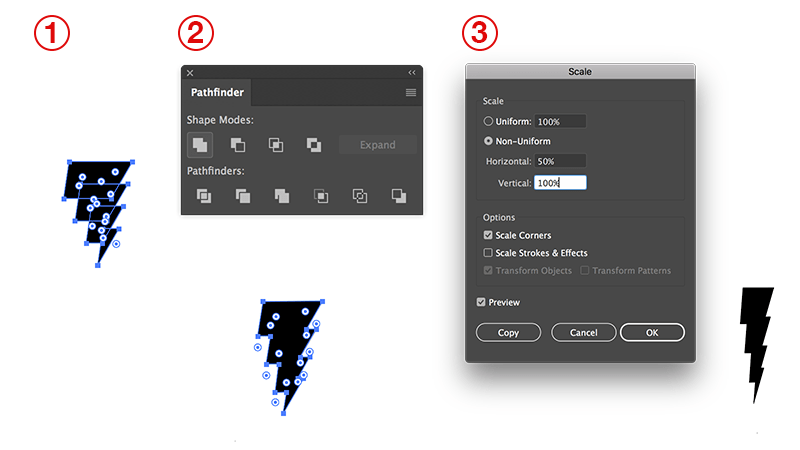
- Arrange the pieces of the triangles like below to create the lightning bolt pattern. Select all of the pieces. From the Pathfinder window, click the Unite shape mode button. If your lightning bolt looks too thin or too chunky, use Object > Transform > Scale to scale the lightning bolt for your desired look.
Well done! You’ve just created your own lightning shock vector in Adobe Illustrator.